
This set of exercises takes your shoulders through their full range of rotation, which is important to do regularly to ensure the longevity of our functional movement and to avoid injury. These movements also bring a lovely sense of openness to the front of the body. You might need a belt or scarf for these exercises.
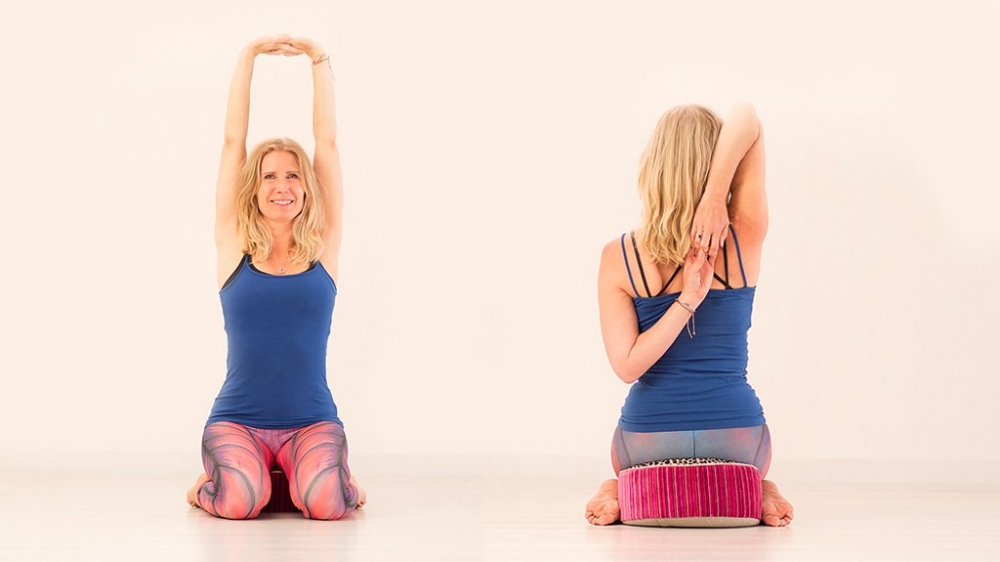
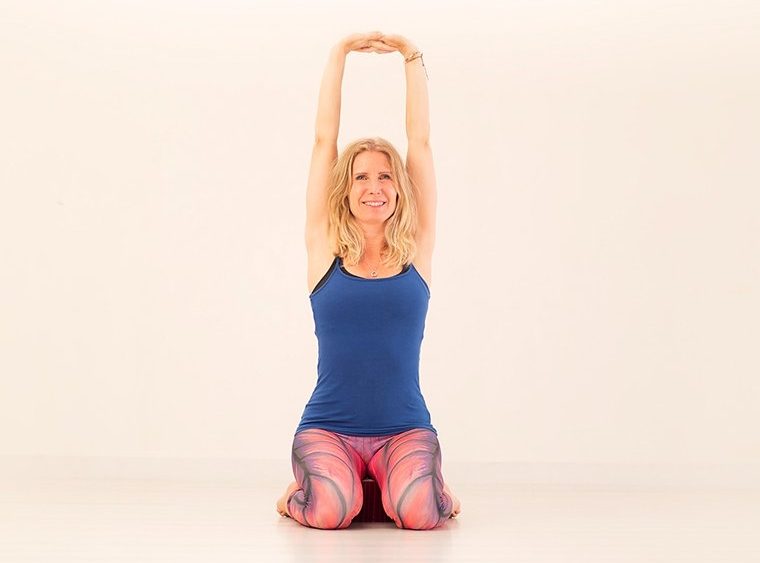
1. Raised arms with interlaced fingers
Interlace the fingers in front of you and as you exhale, push the palms away from you. Inhale and lift your arms up, palms of the hands facing the ceiling. Here you can feel the flexion of the humerus bones and the elevation of the scapula. For an extra stretch, try taking the little fingers further towards the floor. Stay here for a few breaths.
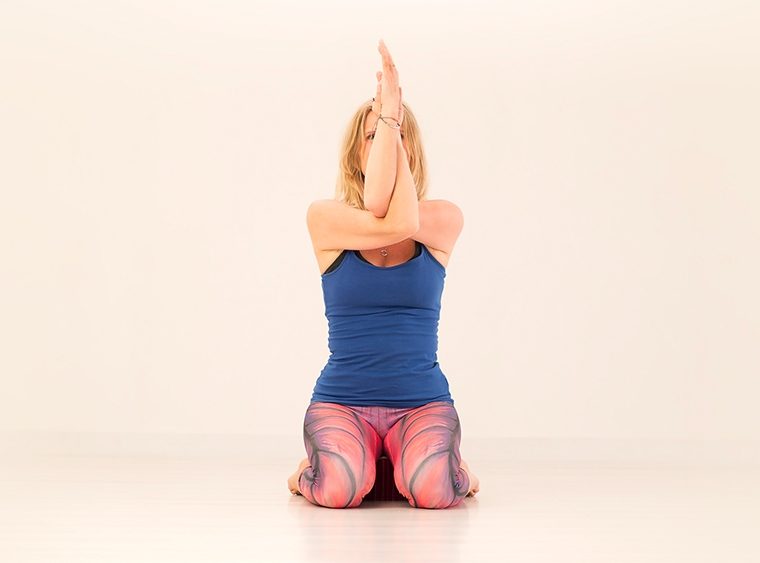
2. Eagle arms
Release your arms and bend them so the elbows are shoulder-height, palms facing forward. Next, bring your left elbow over the right and see if you can touch the palms of the hands together. (If this isn’t possible, you could take the back of the hands together instead). Start to dome the upper back, dropping the chin and the elbows so you feel a stretch between the shoulder blades. If it feels nice, make some nice, fluid circles… Then repeat with the right elbow over left. Afterwards, release the arms gently and bring them down to the sides.
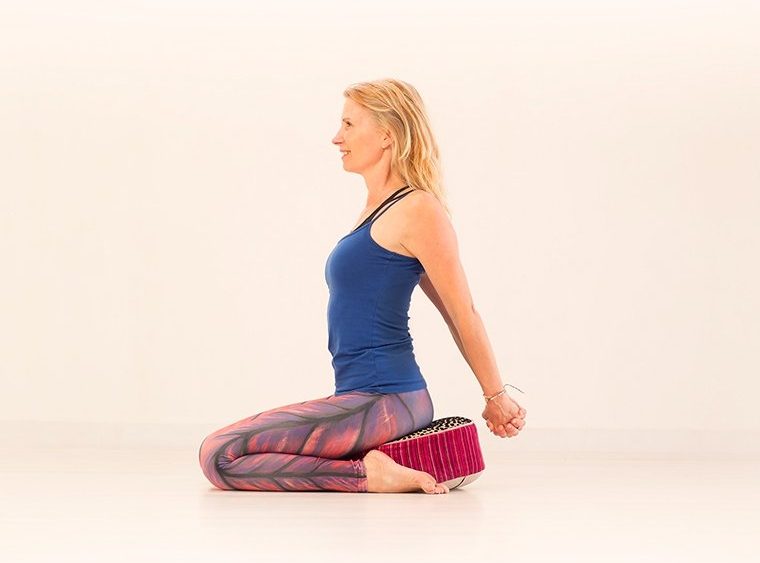
3. Reverse clasp
Bring the arms behind your back and interlace the fingers. If your bone structure makes this bind impossible, take hold of a belt or a scarf. Roll the shoulders back with a little bend in the elbows, then gently begin to straighten the arms. Lift the collar bones and the sternum a little while the shoulder blades release down. Try not to take the movement into the spine, so consciously draw the lower ribs in and stay for a few breaths.
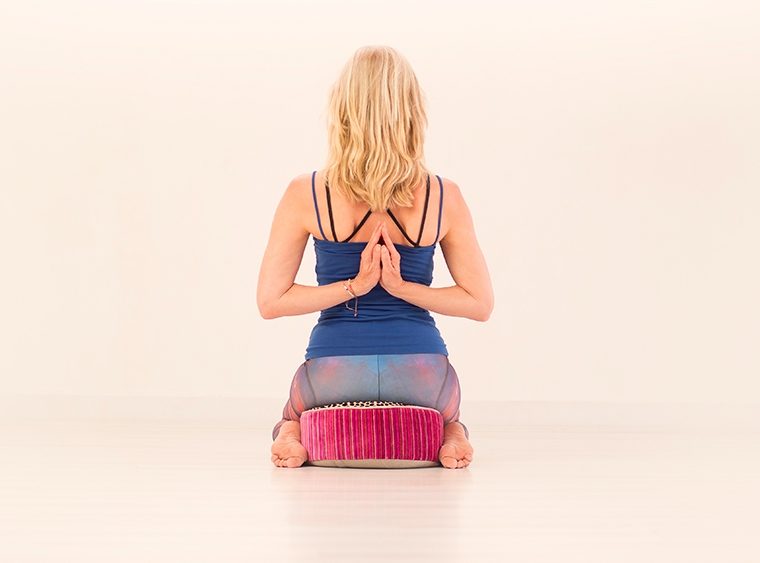
4. Reverse Namaste
Take the arms out to the side with your thumbs facing down. Either hold opposite elbows or take the fingertips together and turn them upwards so that your little fingers are against your spine. This ‘reverse Namaste’ position requires a lot of internal rotation so, as always, don’t force anything. Whichever position you’re in, take the chin back a little, draw the lower ribs slightly in so you’re not arching the back, and breathe evenly. Release gently after a few breaths.
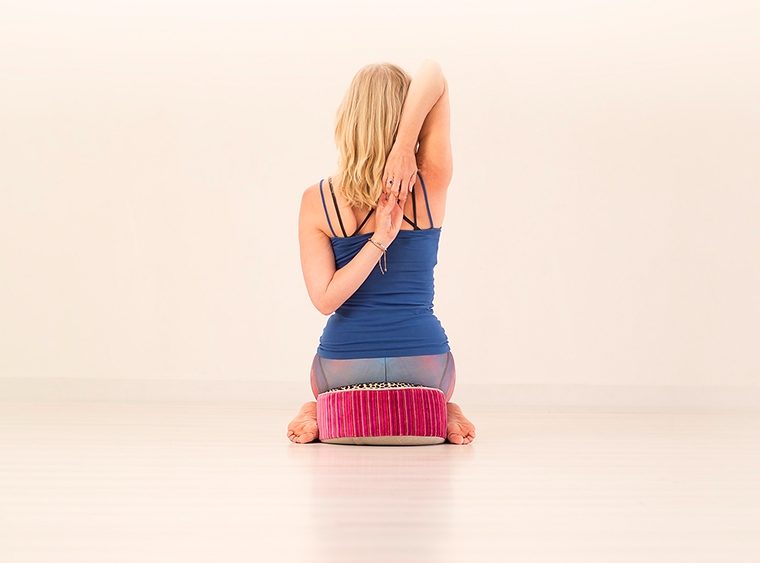
5. Gomukhasana arms
Stretch the left arm out, shoulder height and rotate the palm so it’s facing away from you – thumb points downwards. Bring the back of the hand to the lower back and then upwards to the upper back. Next, stretch your right arm upwards and turn your palm away from you. Bend the top elbow and see if you can clasp the fingertips of the right and left hands lightly together. If this is not possible, you could clasp a belt of a scarf. Take a few breaths in this position (again, ensuring you’re not arching the back) before gently releasing the arms. Repeat on the other side.
To finish, take a few moment to observe the sensations in your shoulders, upper chest and perhaps the neck. Feel how the circulation has increased and observe your breath…
Practise in class with Esther
n.b. This sequence appeared in the Yoga Therapy section of the January 2018 edition of Om Yoga magazine.